
The ease of and ability to manipulate the user interface of Dynamics 365 Finance and Operations to meet the personal needs of individual users makes personalization a very powerful tool. Personalization in Dynamics 365 (D365) are very flexible and manageable for even the most inexperience or technically challenged user after the proper training.
This article is intended to be a user guide to help you learn all the capabilities of personalization and to allow the user to become more confident and comfortable being able to make changes to the screens he or she interacts with on a daily basis.
This article does not cover saved views. If you are interested in learning about the saved views functionality, please see my article How to Use Saved Views where I show you step by step how to use it.
How To Add A Field
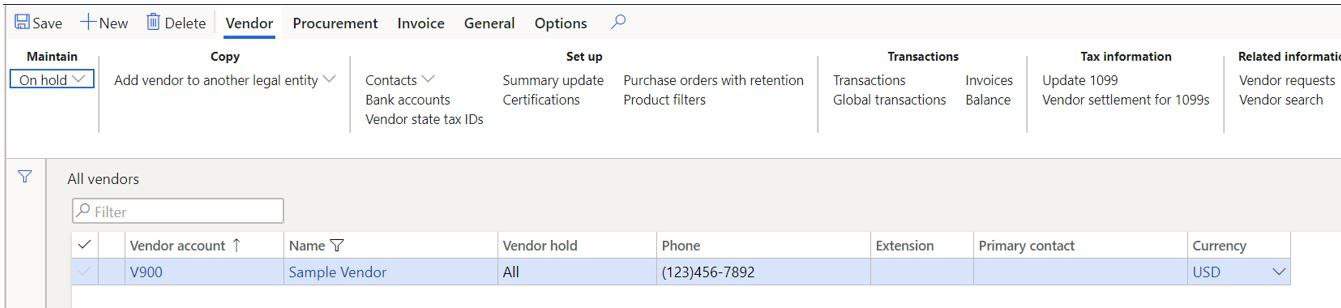
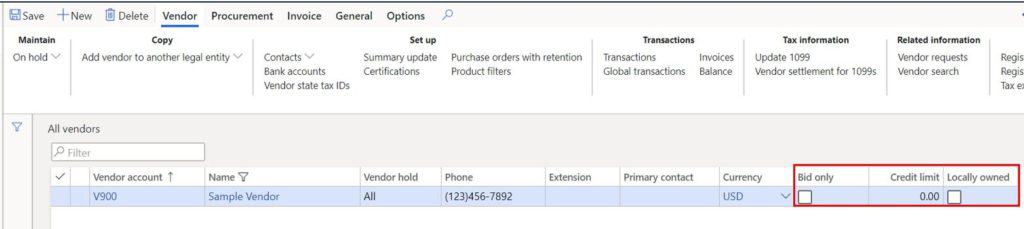
The most common method of personalization in Dynamics 365 is to add a field to a grid. The standard list pages and grids often will not contain all the fields that a user wishes to see when they open the form.
- To add a field to a list page or grid, right click on the grid and click the “Add columns” button.
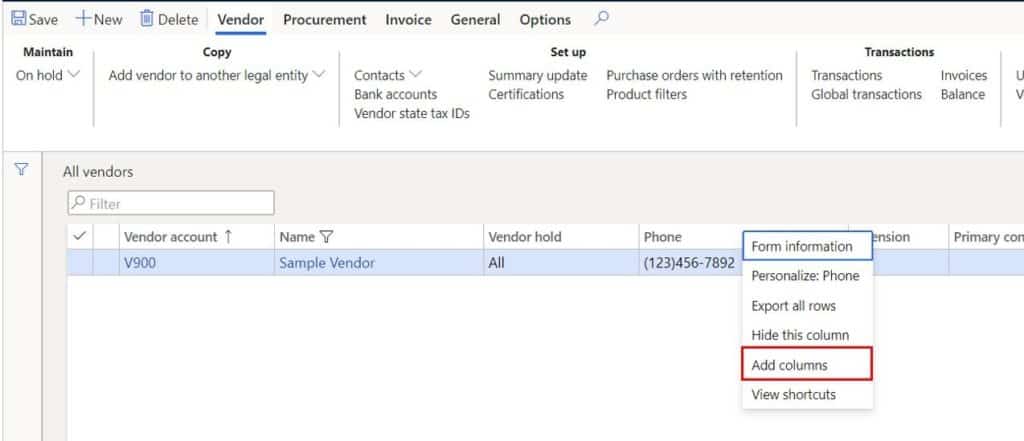
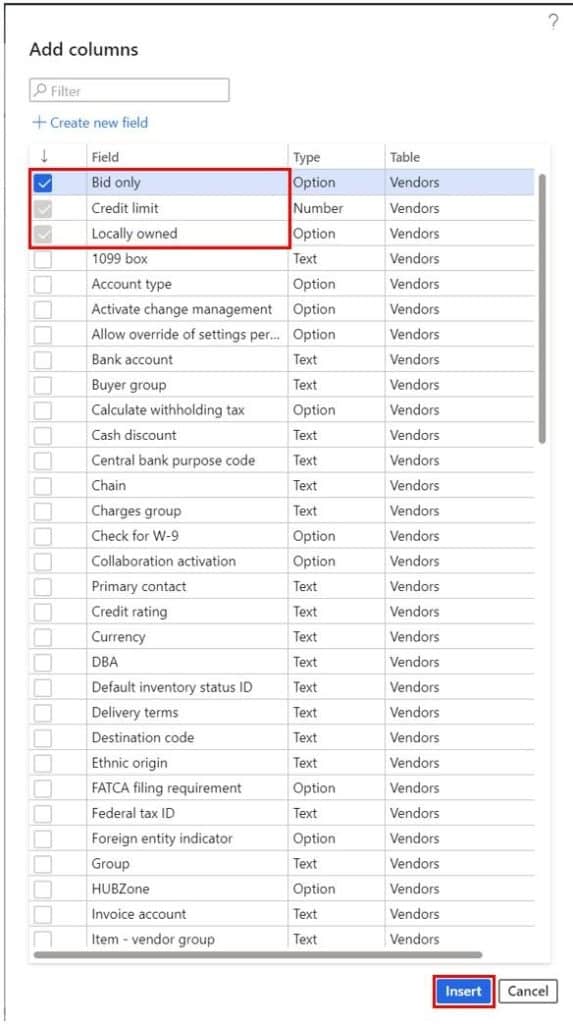
This will open the field chooser pane. Select the fields you would like to add and click the “Insert” button.
Now you will see the new fields added to the grid.
How To Change A Field Name
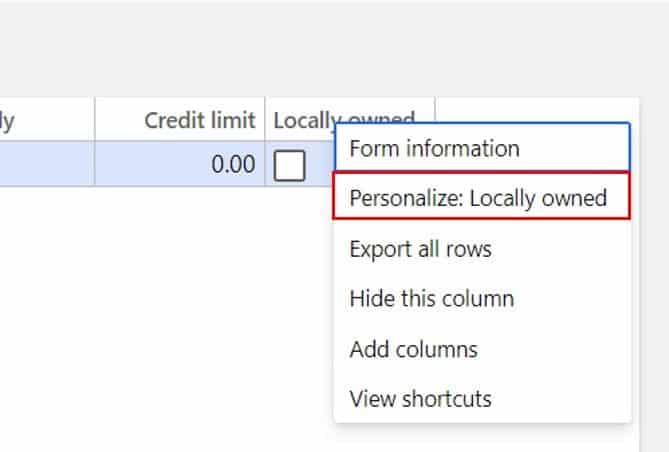
Now that we have some new fields added, maybe you want to change the name of some of the fields.
- To change the name of a field right click on the column header and click “Personalize” button.
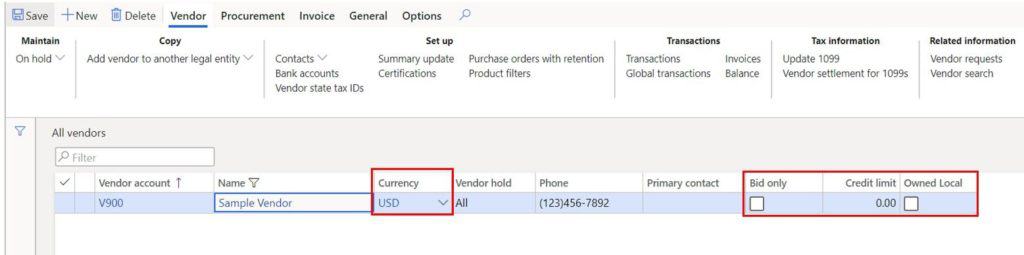
In the personalization box you can now edit the text of the field name. I will change it from “Locally owned” to “Owned Local”.
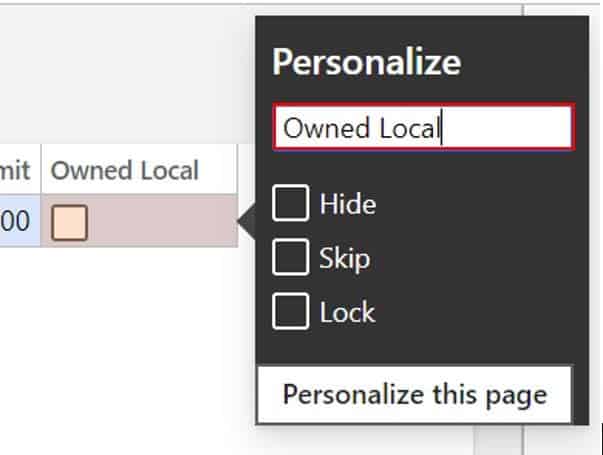
Just click away from the box and your personalization will be complete.
How To Hide A Field
In addition to adding fields, you may want to remove fields.
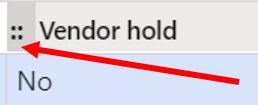
- You can do this by right clicking on the column header of the field you want to remove and click “Hide this column”.
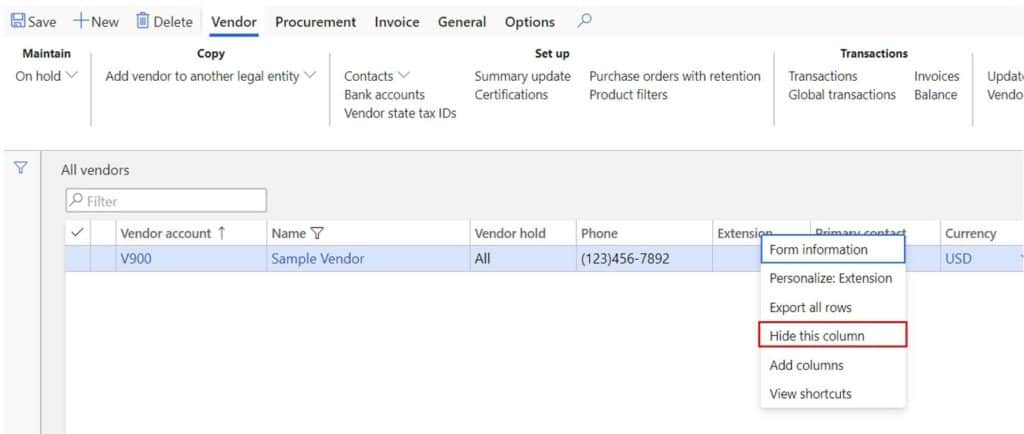
This will remove the column. If you want to add it back, you can add it the same way you did before. Notice the “Extension” field has been removed.
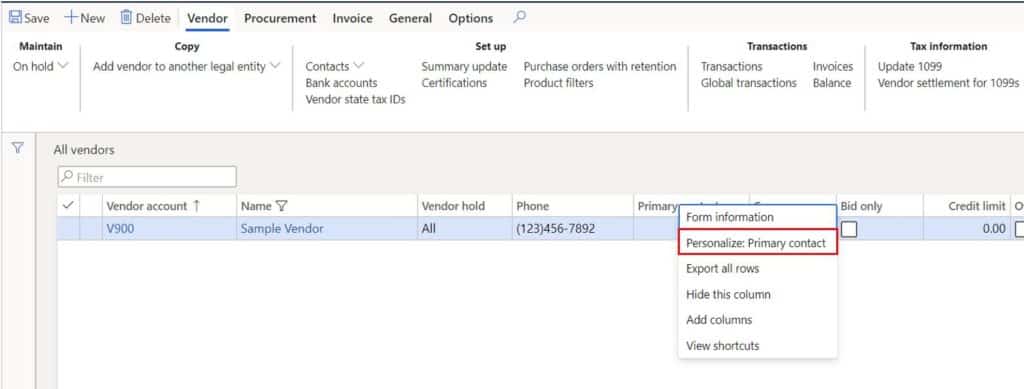
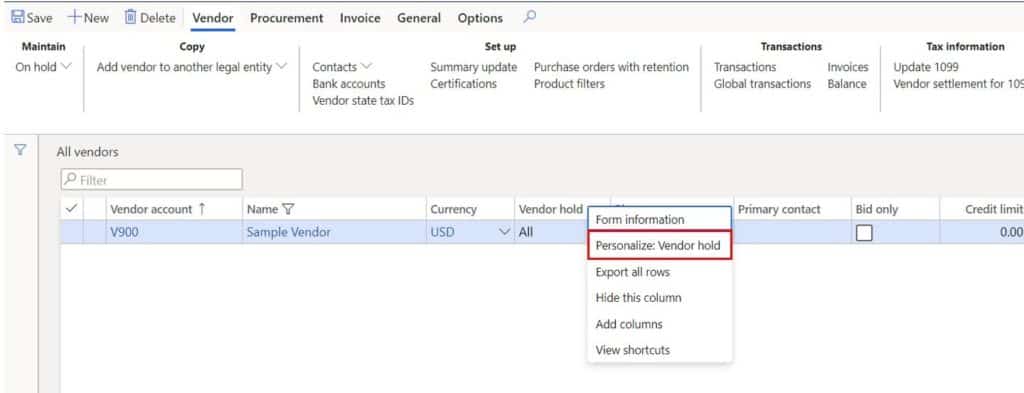
How To Rearrange Fields
Another common personalization task in Dynamics 365 is getting the fields arranged in the order you want to see them.
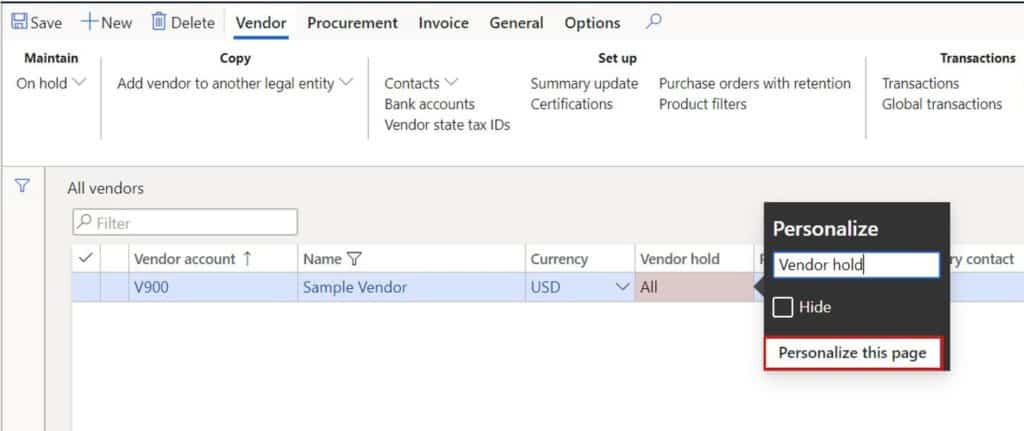
- To do this right click on any column header and click “Personalize”.
Click the “Personalize this page” button.
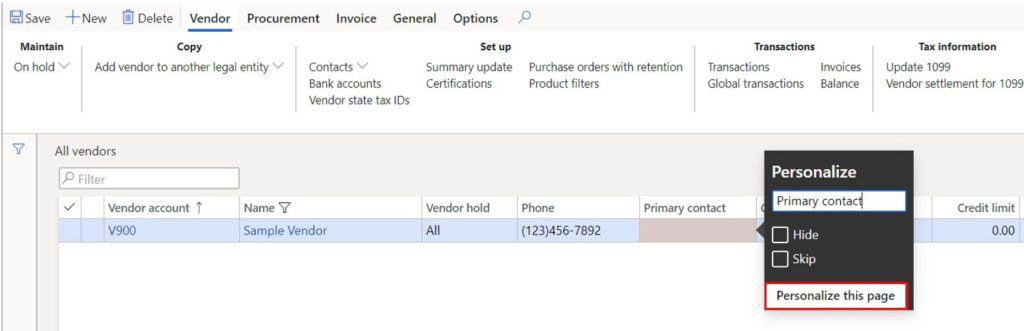
This will open the personalization bar. Click the “Move” button.
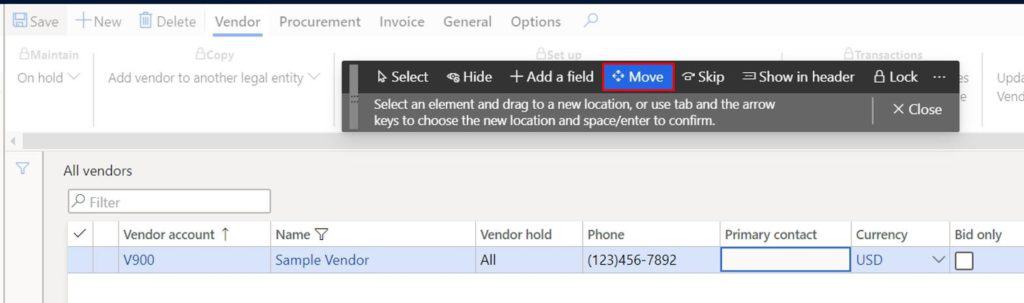
Click the field (you will need to click the field value) you want to move. You will see dashed lines outlining the field you have selected to move.
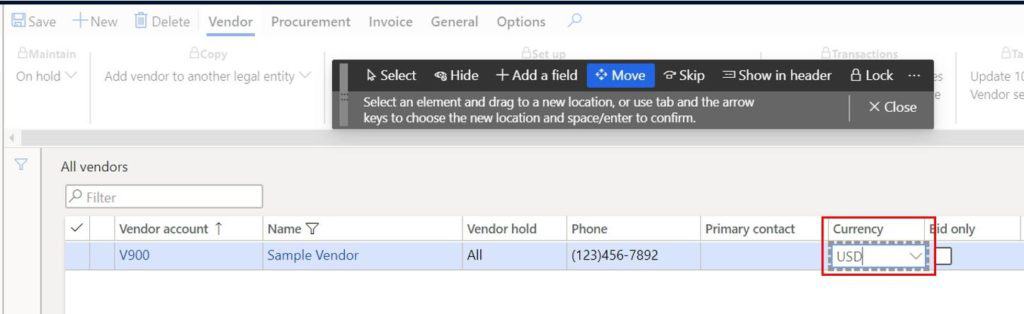
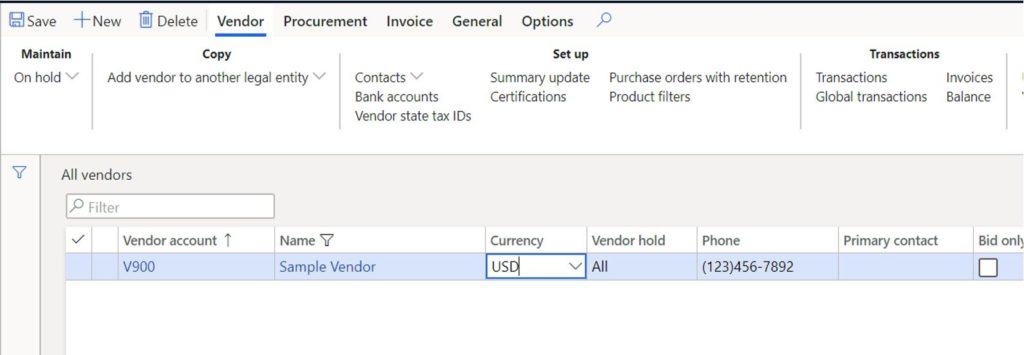
Next drag the field to where you want to move it. You will see an orange line which indicates where the field will be placed. In my case I want the currency field to be after the vendor “Name” field.
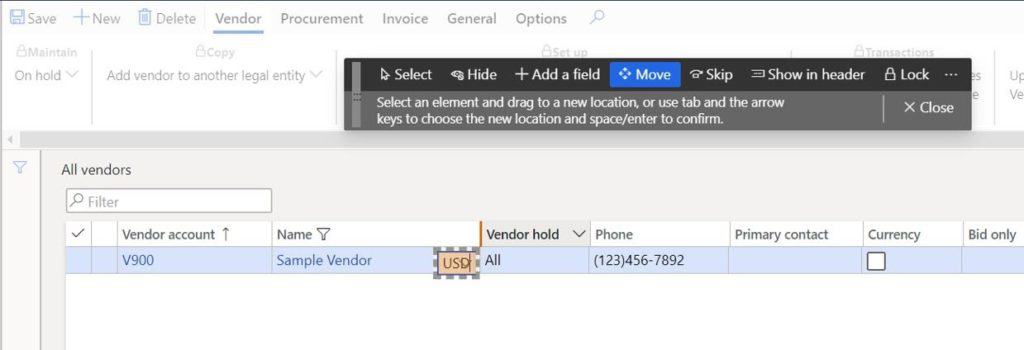
Next close the personalization bar.
If you have the new grid control feature enabled, it is much easier to move fields around in the grid. Simply click next to the field and drag it to the desired location.
Skip Fields In Tab Sequence
In cases where users are entering large amounts of data the tab sequence can be very important. The “Tab” button on your keyboard will move the cursor in Dynamics 365 to the next field during data entry on a record.
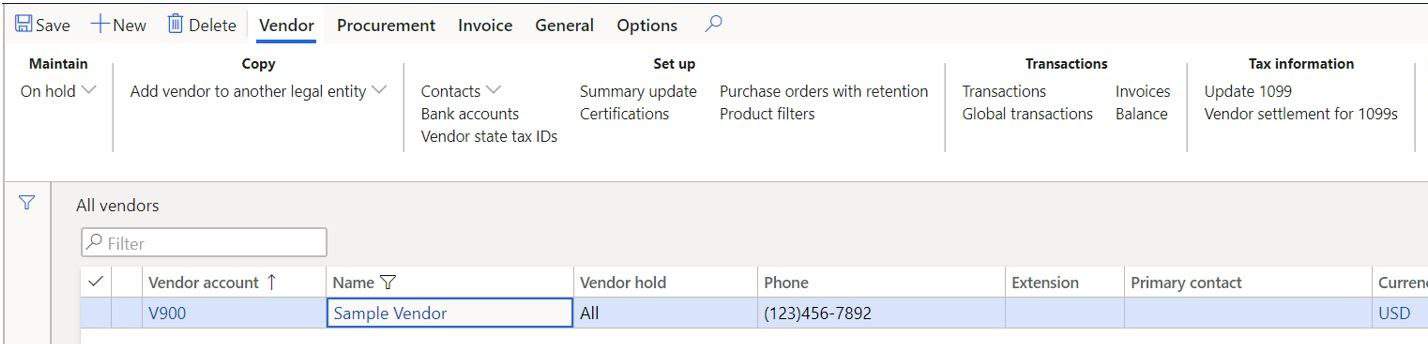
For this example, I am going to open the vendor record to make it more like a data entry scenario. If you want to skip certain fields in the tab sequence you can do this by right clicking on the field, you want to skip in the tab sequence and click the “personalize” button.
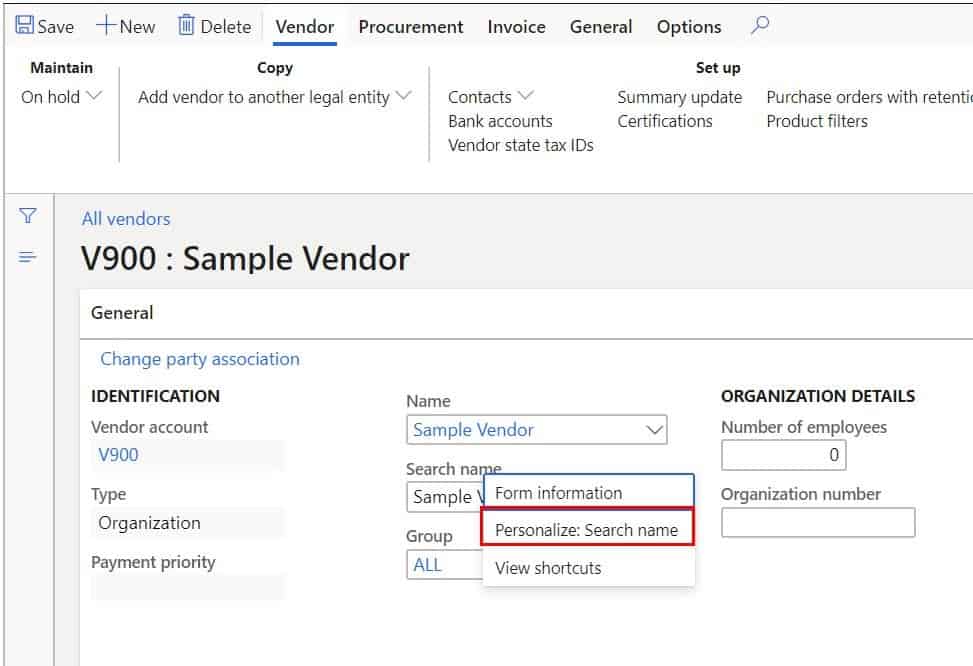
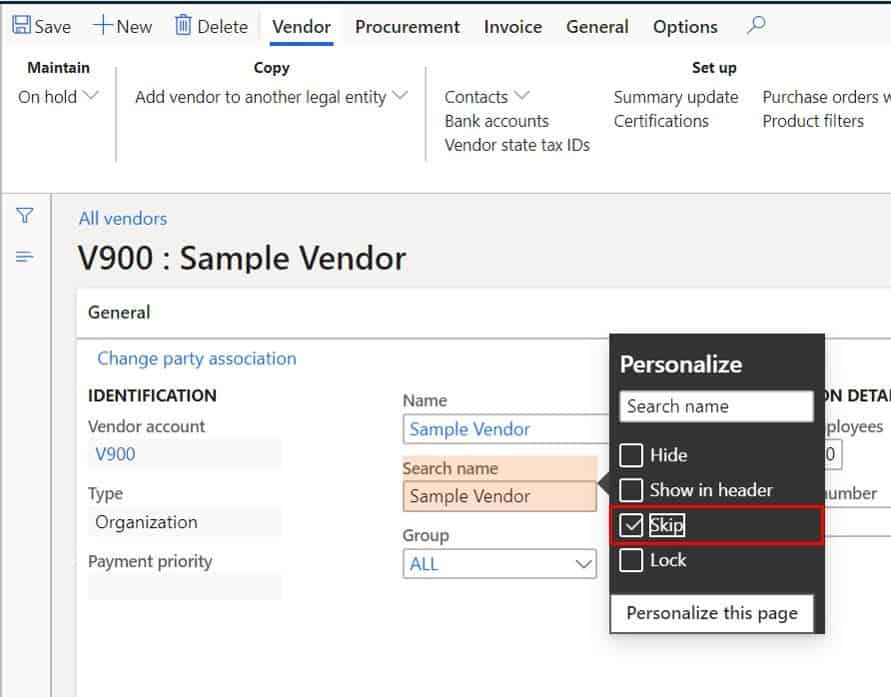
- In the personalize box click the “Skip” selection and click away.
Now when you start tabbing through the fields you will notice that it skips this field in the sequence.
How To Lock A Field
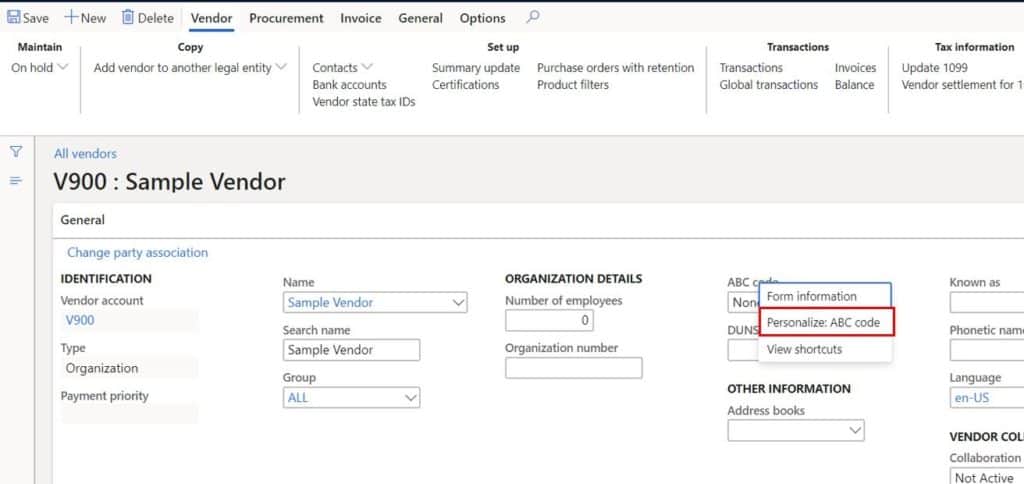
There may be cases where you want to lock down certain fields for users. To do this you could apply a personalization to a user account with the fields you did not want them to access already locked down. To do this right click on the field you want to lock down and click “Personalize”.
On the personalize box click select the “Lock” flag.
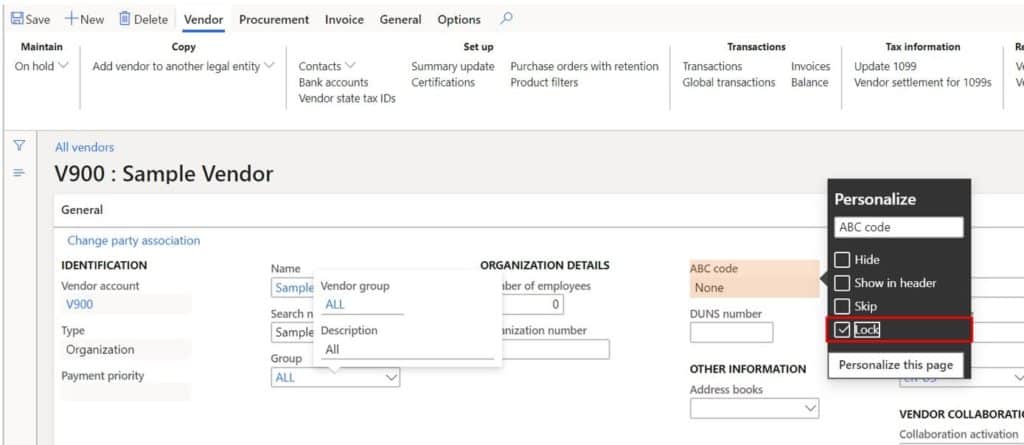
You will now see that the field is greyed out and disabled for editing. This is a powerful option for optimizing and securitizing certain forms within Dynamics 365.
How To Export Personalization
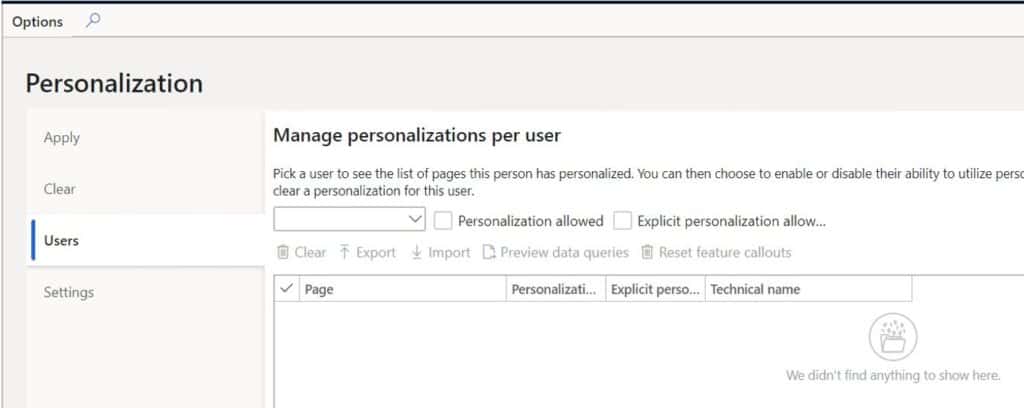
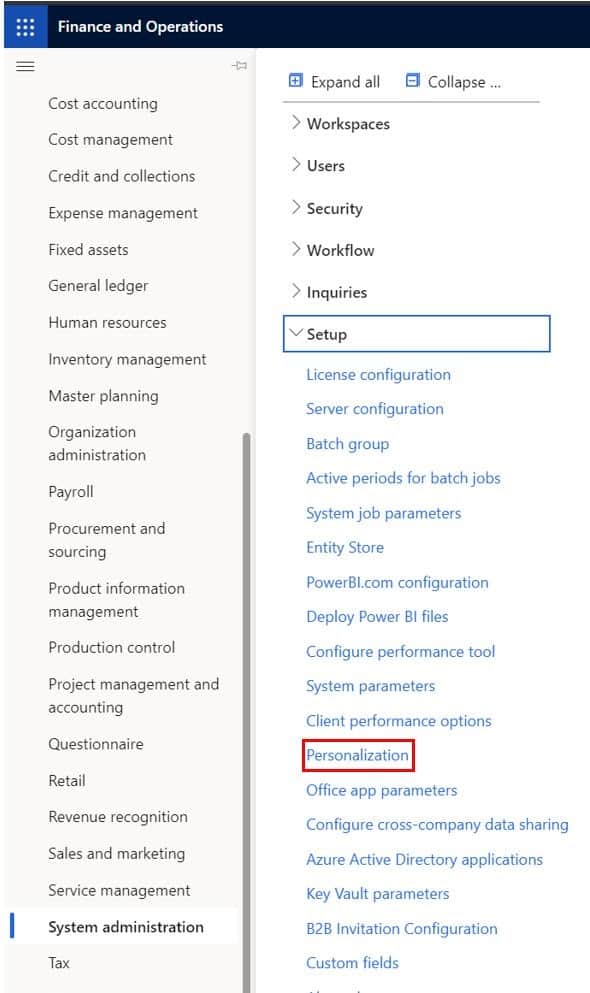
Now that you have this knowledge you may be wondering how can we control this? There is an option in System administration > Setup > Personalization where you can enable or disable personalization down to the individual user. So, what you could do is have super users from various departments come up with standard personalizations for certain departments, have them export personalization and then import then on other users. This would be a way you could standardize forms.
To export a personalization right click and click the “Personalization” button.
Click the “Personalize this page” button.
On the personalization bar click the ellipses “…” button and click “Export”.
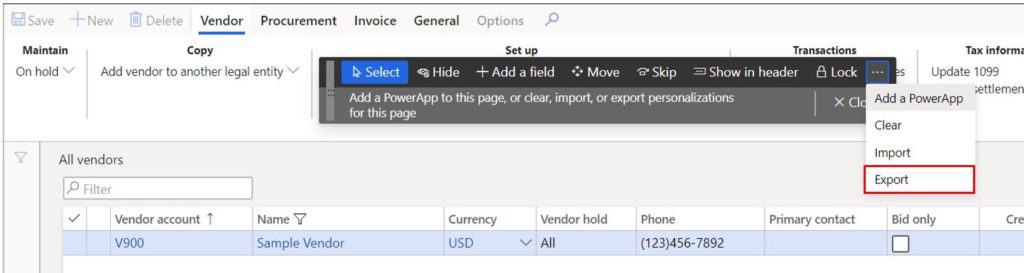
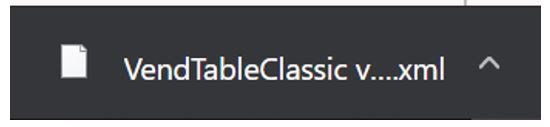
This will export an XML file containing your personalization.
Remove Personalization
There may be cases where you just want to start over or start from scratch.
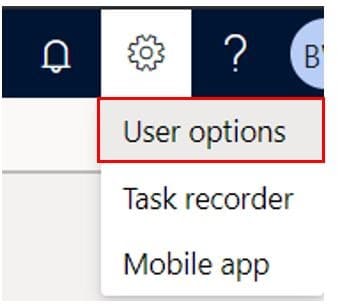
- If you wanted to remove all the personalization you have made you can do this by clicking “Settings” button (the gear icon in the top right corner) and click “User options”.
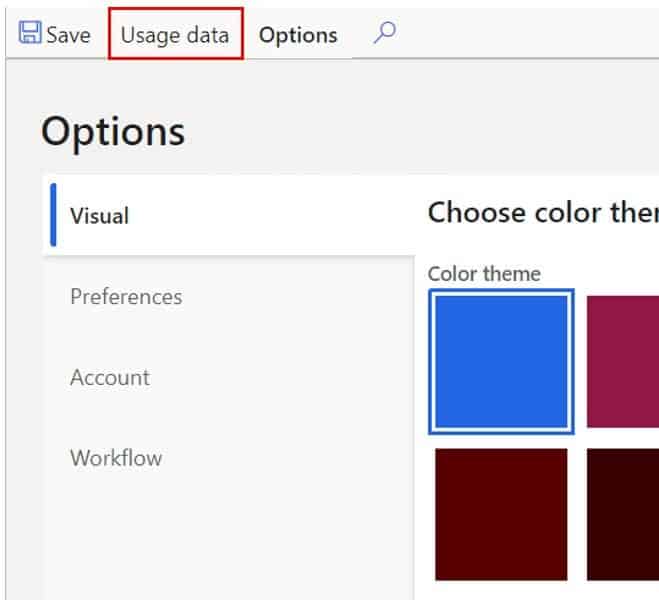
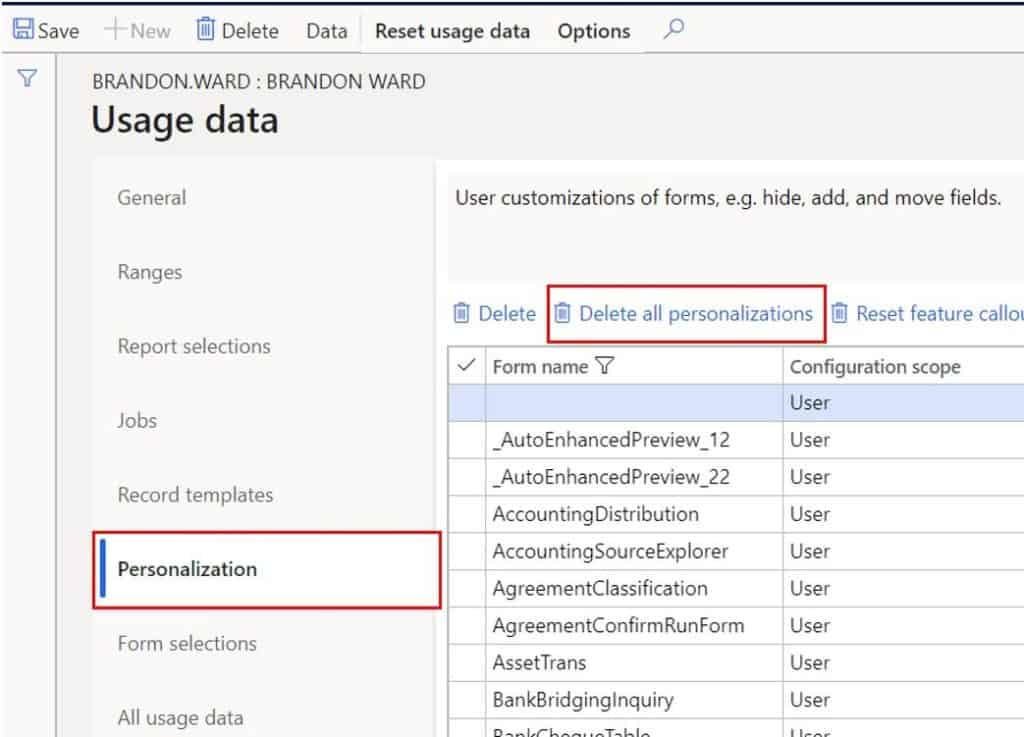
In the user options form click the “Usage data” button in the top left corner.
Click the “Personalization” tab and click the “Delete all personalizations”.
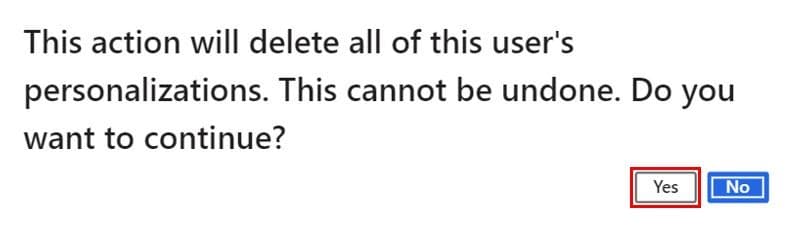
You will get a warning message asking you to confirm. Click “Yes”.
Now if you go back to the page or grid where you did your personalizations you will see that they are now gone.
How To Import Personalization
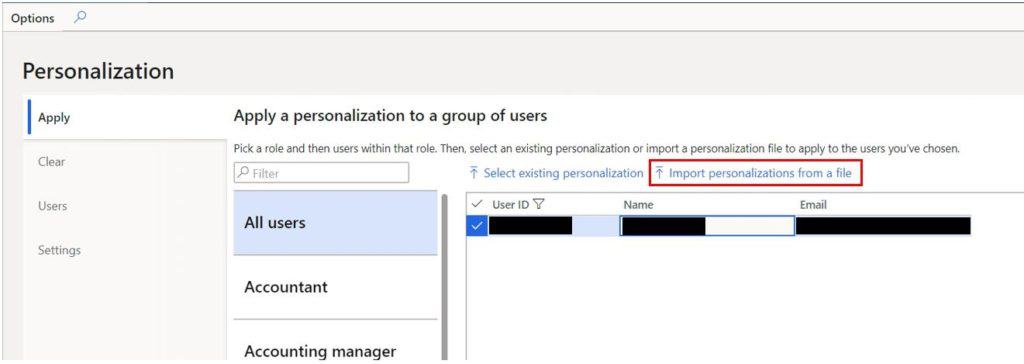
If you have exported your personalizations you can import them back into the system or into another environment for that matter by navigating to System administration > Setup > Personalization.
Select the user or security role you want to import the personalization against and click the “Import personalizations from a file” button.
- Click the “Browse” button. This will open a file explorer where you can select the personalization XML file you exported.
- Once the import is complete click the “Ok” button.
- Now if you go back to the page or grid where you made your personalization changes you should see them restored.
Takeaways
I hope this article has provided you some step by step instruction on how personalization works and how easy it can be. I also hope this article has opened your eyes to some new possibilities that the import and export personalization feature offers in terms of standardizing forms and never and preventing the loss of personalization after environment refreshes. If there were related topics I did not cover that you would like me to write about, please suggest an article at the bottom of the home page or the “All articles” page.